Not recommended for the faint of heart! It was a fairly rough road with a few bumps, but we made it five states over, from the great plains to the "great river."
We've been trying to prepare the girls for months, talking to them about moving and living in a new house. Thanks to The Berenstain Bears' Moving Day book, E especially, really seemed to grasp the concept.
When we finally got to our new place, she was constantly comparing things that happened to us with the Berenstain Bears. C, being 17-months-old, didn't quite comprehend what was going on, but has done a great job rolling with the punches.
It took five days after closing on our house (a whole separate story!), but our things finally arrived. The night before the moving truck arrived, poor E was trying so hard, but couldn't keep it together. She didn't understand where her things were and why it was taking so long for them to get here. She missed her big-girl bed and her Minnie stickers for her wall. And where were all of their toys? C could feel the tension and was definitely missing her things too.
The look on those girls' faces when the movers started hauling boxes and things into the house was priceless. Even better, though, were the looks they gave as I put them down for nap in their own beds. Both girls were more than happy, they were relieved that, in fact, Mommy and Daddy were telling the truth: their things WERE going to be coming here after all.
After going through the whole moving process with our two little ones, I came up with a few tips for moving with toddlers that I took away from the experience. Check them out at www.playfullearning.net!
Wednesday, January 21, 2015
Saturday, January 10, 2015
Homemade Felt Vegetable Garden (Part 2)
You need:
- Green felt
- green embroidery thread (and needle)
- 1/2 inch thick dowel cut down to about 6 inches
- sew-on velcro
- 3 green pipe cleaners
I had already sewn my green tube together, so sorry I didn't get a picture of it before! I cut out a piece of felt that was 8 inches by two inches, folded it in half the "hot dog way" and sewed a quick stitch up the side and across ONE end (leaving a small opening at the other end). I then turned it right-side-out so that the seam was now on the inside.
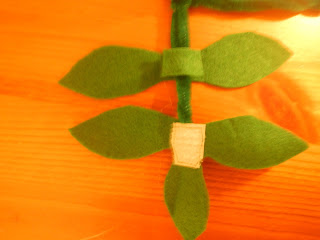
To create the shape of the tomato plant, I took the three green pipe cleaners, folded each in half, and twisted them together into the shape shown in the picture above. Don't worry about the bottom "stem" part of the pipe cleaners, that will be hidden inside of the green felt stem when you're done. If you want more branches, simply add more pipe cleaners.
Next, I cut the velcro to fit on the underside in the middle of each of the three-leaf pieces. I placed one of the pipe cleaner branches in between the three-leaf piece and the velcro, and sewed around the velcro to secure it in place. I repeated this at the end of each of the other two branches.
I then cut a small square of green felt to fit the center of the two-leaf pieces.
Placing the leaf-piece below and the small square above the pipe cleaner branch, I sewed around the square to secure the leaves in place on all three branches as well.
Here are the branches before the stem is added.
Next, I took the dowel and slid it into the green felt stem sleeve.
Once that was inside, I slid the "stem" piece of the branches down into the stem sleeve alongside the dowel.
To secure it into place I cut a small circle of green felt, placed it on top of the center of the branches and hand-stitched it to the opening of the stem sleeve. I don't have pictures of my steps for making the tomatoes because it is shown beautifully in this blog post by Et Moi Alors. It's in French, but the pictures say it all! The only change I made was to add a piece of velcro to the top of the tomato so that they could hang from the branches.
Saturday, January 3, 2015
Homemade Felt Vegetable Garden (Part 1)
We were on a strict budget for Christmas this year, so I had to get creative when getting the girls' gifts. E is always pretending that she has a vegetable garden, so I thought, why not make one? Though it made for a lot of late nights sewing, it was a lot of fun and definitely worth it! I didn't think about sharing it until I was almost done, so I don't have as many pictures as I'd like, but I'll share what I have!
There are so many great tutorials out there that I took advantage of while creating her vegetable garden. I ended up with corn stalks, tomato plants, carrots, beets, potatoes and green onions. For the sake of time (yours and mine), I'll show a couple of vegetables created at a time. Here's the finished product:
I found the basket at Michael's Craft Store. For the dirt I simply cut pool noodles the width of the basket and covered each with brown felt, using hot glue to hold the felt on. (Sorry I don't have pictures of this step since I actually am reusing the basket that I created for their flower garden.) Here's a picture I dug up of the finished "dirt" (pun intended).
I started with the carrots since there was a great tutorial and they seemed the easiest to tackle. Here is the tutorial I used by Craftiness Is Not Optional: Easy Carrot Recipe. My only addition was to add a wide craft stick/tongue depressor inside the carrot to make it easier to stick into the garden while still maintaining its shape. Since my steps were so similar to the tutorial I used, I didn't take pictures of my process.
Next were the beets. This was another one I found a great tutorial for by Cut Out And Keep: Beets! I loved how they made the leaves look curly, so I imitated that part exactly. However, my beets are more 2D, since I wanted them to fit in between the pool noodle dirt rows, so I drew a beet shape on a piece of paper and cut out 2 (for each beet) from the dark pink felt. I also added a smaller piece of a craft stick to the inside, just as I had done with my carrots. Here are the finished beets:
I'll share the tomato plants in more detail (including pictures) in my next post. :)
Subscribe to:
Posts (Atom)


